Basic Welding: A First Weekend With a MIG
Buy the helmet before the welder, burn a dozen practice beads on scrap, and learn to hear a good weld before you try to see one.
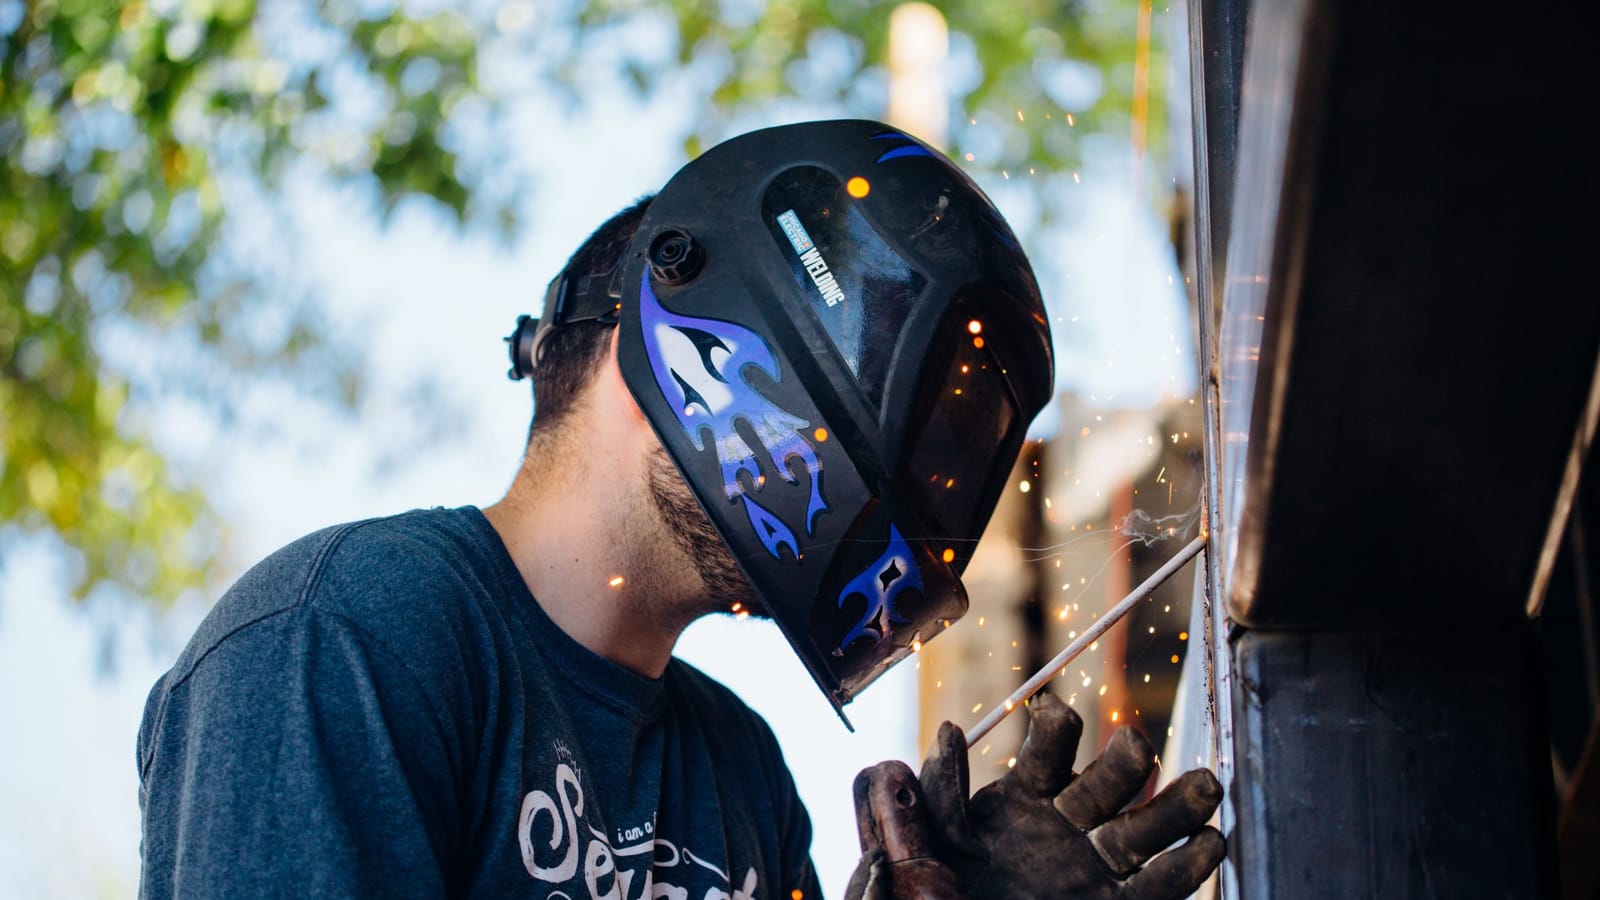
Buy the helmet before you buy the welder.
An auto-darkening hood with a variable shade from about 9 to 13 and four arc sensors is the single item that decides whether your weekend is productive or miserable. A fixed-shade hood makes you nod it down blind, which means your gun moves off the line before the arc even starts. Look for a genuine ANSI Z87.1 or EN 379 marking on the lens. A hood without one is a tinted plastic gamble against ultraviolet light, and your corneas don't heal on a schedule you control.
Everything else on the shopping list is cheaper than the hood's worth.
What machine, and what to skip
A 120-volt MIG running 0.030 solid wire with shielding gas will handle steel from about 16 gauge up to a quarter inch if you're patient and bevel your edges. That covers gates, brackets, racks, trailer floors and most of what a homeowner actually needs. If you have 240-volt service in the garage, a dual-voltage machine costs a little more and removes the ceiling entirely.
Gas or flux-core is the first real fork. Self-shielded flux-core wire needs no bottle, works in wind, and bites through mill scale and light rust. It also throws slag you have to chip, smokes heavily, and leaves a rougher bead. Solid wire with a C25 mix (75 percent argon, 25 percent CO2) runs clean, quiet and pretty, and it quits working the moment a breeze crosses the puddle. If your welding will happen outdoors on a farm gate, flux-core is the honest answer and you can stop reading the gas section.
For a garage weekend, get gas. Rent or exchange a cylinder from a local supplier rather than buying one outright until you know you'll keep at it.
The rest of the pile:
- Leather gloves, not the thin TIG kind. Get gauntlets.
- A cotton or leather jacket. Not a hoodie.
- A 4.5-inch angle grinder, a stack of 60-grit flap discs and a few cutting wheels.
- Locking welding clamps, a 12-inch combination square, soapstone.
- A face shield and safety glasses for grinding, worn under or instead of the hood.
- An ABC fire extinguisher within arm's reach.
The safety part, in the order it bites you
Sparks travel further than you think. Before you strike an arc, sweep the floor, move the gas can, the sawdust, the fuel-soaked rag and the cardboard. Then look up and behind you, because that's where the grinder throws.
Take the butane lighter out of your pocket. Take everything out of your pockets. A trouser cuff catches sparks beautifully and you won't notice until it's smouldering.
Synthetic clothing melts onto skin. Wear cotton, wool or leather, full-length, with boots and the trouser legs over the boots. Not shorts. Not sneakers with mesh uppers.
Ventilation matters more than most beginners believe. Open the door, put a fan behind you blowing fumes away, and never let it blow across the weld or it'll strip the shielding gas off the puddle. And if the steel is galvanized, grind the zinc coating back an inch either side of the joint before you weld it. Zinc fumes cause metal fume fever, which feels like flu and is entirely avoidable.
Never weld a drum, tank or container that held fuel or solvent. Not one you've rinsed. Not one you've filled with water. Just don't.
Last thing before you shut the door for the night: stay in the shop for half an hour after the final weld. Smouldering fires need time to declare themselves.
Setting up
The chart inside the machine door isn't marketing. It's a starting point that works. Find the row for your material thickness, your wire diameter and your gas, and set voltage and wire speed to match.
Open the gas to roughly 20 to 25 cubic feet per hour. More is wasted and can actually pull air into the shield.
Clamp the ground directly to the workpiece or the steel table it sits on. Through paint, through rust, through mill scale, the arc gets unstable and you'll blame yourself. Grind a shiny patch for the clamp.
Snip the wire so about three-eighths of an inch sticks past the contact tip. That stickout distance is a real variable, not a detail. Long stickout drops your amperage and gives you a cold, ropey bead sitting on top of the metal.
Your first hour is beads on plate
Get a dozen pieces of quarter-inch mild steel, six inches by two. Grind them clean. Draw soapstone lines across them. Then run beads on the flat, one after another, with no joint to worry about.
Hold the gun at about 10 to 15 degrees off vertical and push the puddle away from you rather than dragging it. Pushing gives a flatter bead and better gas coverage on thinner steel. Dragging digs deeper, which is what you want on thick material and what flux-core wants all the time.
Move at a steady pace. Most beginners go too slowly, which piles up a tall bead with poor fusion, or too fast, which leaves a thin worm of metal that snaps off.
Listen. A well-set MIG sounds like bacon frying. Steady, even sizzle. Loud popping and spitting usually means wire speed too high or voltage too low. A hissing, spraying, wandering arc means the opposite. Change one dial at a time, run another bead, listen again.
Around bead six you'll lift the hood and find the wire fused into the nozzle because you held the trigger a half-second too long at the end. Snip it flush, pull the contact tip, clear it, and keep going. Everyone does this.
Day two: joints, and the three that teach you everything
Lap joint. Two plates overlapping an inch. Aim the arc about 70 percent at the bottom plate, because the top plate's exposed edge melts far faster and will wash away if you favor it.
T-joint fillet. One plate standing on another. Split the angle at 45 degrees, hold a slight push, and watch the toes of the weld. If one side has a sharp groove cut into the parent metal, that's undercut, and it means too much voltage or too fast a travel.
Butt joint. Two plates edge to edge. Leave a gap about the thickness of your wire, tack both ends, tack the middle, then weld. Tacking matters because heat pulls metal. Weld a long seam in one pass and the plates will close up and bow toward you.
Cut every one of those joints in half with the grinder and look at the cross-section. If the weld metal only sits on the surface with a visible line under it, you had no penetration. That's the whole lesson, and you can't learn it from the top of the bead.
What porosity is telling you
Little pinholes in the finished weld mean your gas shield failed. Check the obvious things in this order: gas turned on, cylinder not empty, nozzle not packed with spatter, fan not blowing across the arc, garage door not letting wind in, stickout not too long. Rust, paint, oil and moisture on the steel do the same thing. Grind first, then weld.
Spray anti-spatter on the nozzle and the surrounding plate. It saves twenty minutes of cleanup.
Build something ugly on purpose
Your first project should not be the thing you'll look at every day. Make a cart for the welder, or a pair of sawhorses from one-inch square tube. Cut, clamp, square it with the combination square, tack all the corners, check for square again, then finish the welds. Grind the visible ones with a flap disc, scuff, prime, paint.
And know the line you're not ready to cross. A weekend of practice doesn't qualify you to weld a tow hitch, a trailer coupler, a roll cage, a ladder rack or anything that gets between a person and a fall. Structural work is inspected, certified and boring for good reasons. Take that job to a shop, watch what they do, and ask questions while they work.
Then go home and run another ten beads on scrap. The good news about welding is that the practice material costs almost nothing and you can cut your own work apart to grade it.
Wes Dunbar
Country & Skills
Grew up on an acreage and never quite left. Covers trucks, trades, land, and how to do the thing yourself.

Watch
Worth an hour of your evening
More from Skills.
From channels we rate. Plays on YouTube.
Read next