The running toilet is a fifteen-minute fix, not a plumber call
Two parts cause almost every running toilet. You can tell which one in thirty seconds, and both cost under twenty dollars to replace.
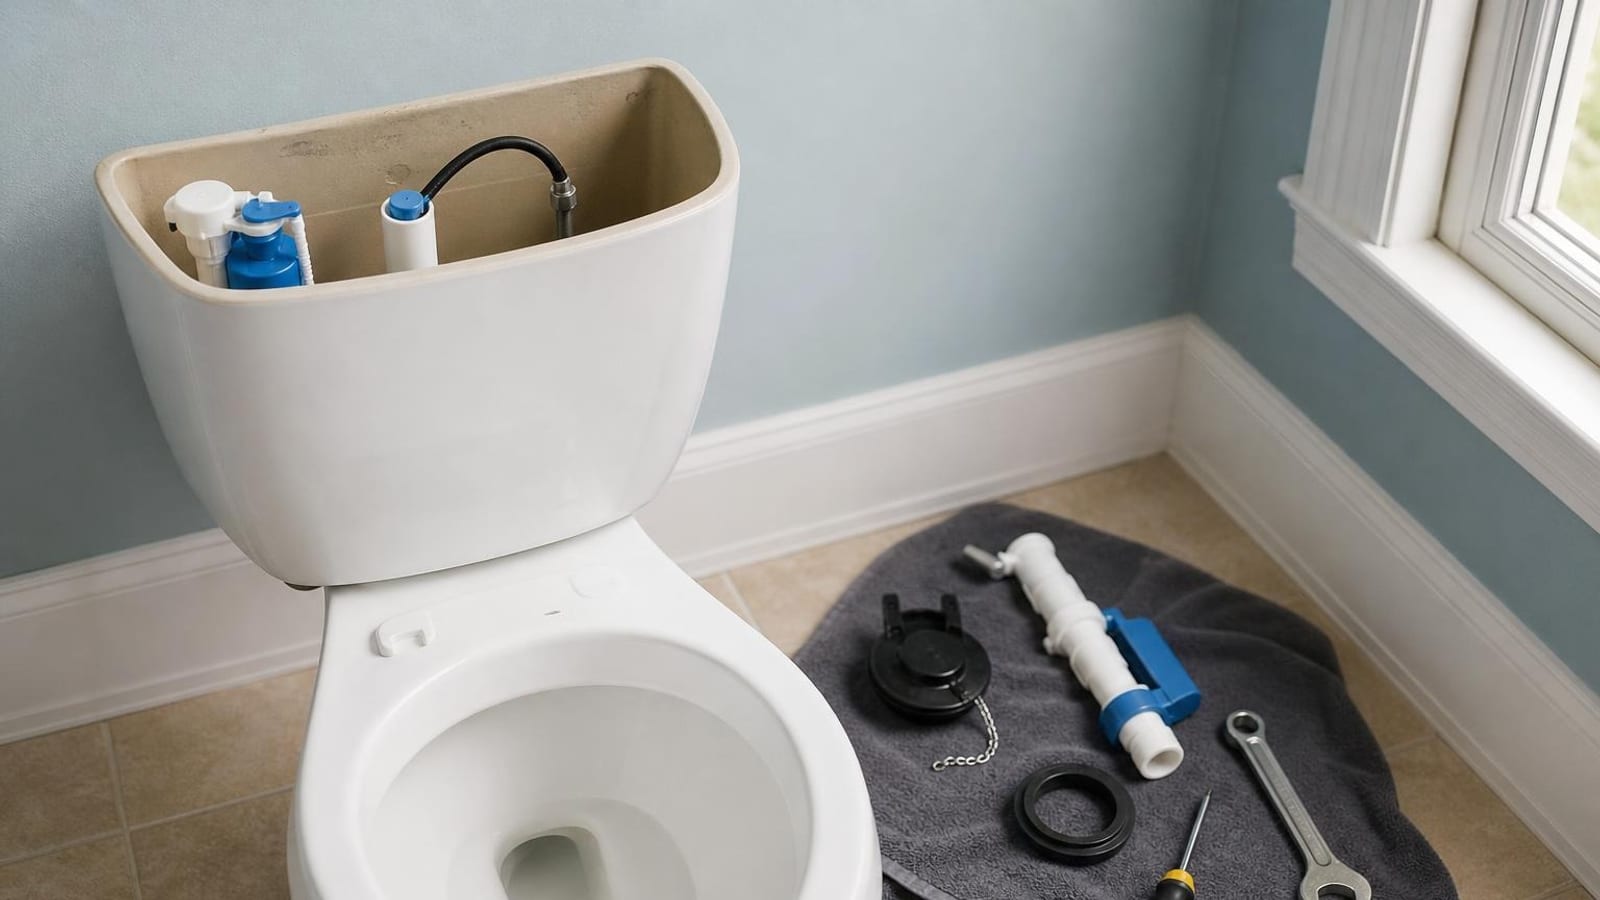
Two parts cause almost every running toilet. The flapper at the bottom of the tank, or the fill valve on the left. Everything else is rare. You can tell which one you've got in about thirty seconds, and both parts cost less than twenty dollars at any hardware store.
Take the lid off the tank and set it flat on the floor, not balanced on the seat. Tank lids are heavy porcelain and they crack in a way that can't be repaired. Now look at the water level.
There's a vertical plastic tube in the middle of the tank, usually an inch or so across. That's the overflow tube. The water should sit about an inch below the top of it. If water is trickling over the rim of that tube and down the inside, your fill valve isn't shutting off, and the tank is draining into the bowl continuously through the overflow. That's a fill valve or float problem.
If the water level is correct and sitting still, but you can hear a faint hiss or see a ripple in the bowl, water is leaking past the flapper. The tank slowly empties, the fill valve wakes up every twenty minutes to top it off, and you get that ghost flush at two in the morning.
Before you touch anything
Find the shutoff valve. It's on the wall or floor behind the toilet, on the left, where the supply line comes in. Turn it clockwise until it stops. If it's an older multi-turn valve with a round handle, it may take five or six full turns.
Test it by flushing. If the tank doesn't refill, the valve holds and you're fine.
If it keeps refilling, the valve is worn through and won't seat. Don't force it. Forcing a seized valve is how a fifteen-minute job becomes a soaked subfloor at nine on a Sunday night. Shut the water off at the house main instead, and put replacing that valve on the list for a plumber, because it usually means cutting or sweating pipe.
There's no electricity involved in any of this, which is the nice part. The only real hazards are cracked porcelain, stripped plastic threads, and standing water on tile.
Tools: a sponge, a small bucket or bowl, an old towel, and one pair of channel-lock pliers. That's genuinely it for most of these jobs.
The flapper fix
Flush and hold the handle down so the tank drains as far as it will go. Sponge out the last inch of water into the bucket. You want the bottom of the tank close to dry so you can see what you're doing.
Now look at the flapper. It's a rubber or silicone disc hinged onto two ears on the sides of the overflow tube, with a chain running up to the flush lever. Unhook the chain. Pop the ears off the pegs, which usually means flexing them outward with your thumbs.
Run a finger around the rim you just lifted it off. That ring is the flush valve seat. If you feel grit, mineral crust, or a slick film, wipe it clean with a rag. A perfectly good flapper won't seal on a dirty seat, and this alone fixes a fair number of running toilets.
Look at the old flapper. If it's stiff, warped, or your thumb comes away black, it's done. Rubber hardens and stops conforming to the seat, usually somewhere between four and six years in, faster if your water is treated heavily.
Measure before you buy. Most flappers are two inch. Newer high-efficiency toilets often use three inch, and the two look obvious side by side once you know. Take the old one to the store with you. A universal two-inch flapper runs roughly six to ten dollars.
Some toilets, particularly certain Kohler and Toto models, don't have a flapper at all. They use a tall canister that lifts straight up with a rubber seal ring on the bottom. Same principle, different part. The seal pulls off and a new one presses on, but you'll want the manufacturer's part number rather than a universal.
Fit the new flapper on the pegs. Hook the chain to the lever arm with about half an inch of slack. Too tight and the flapper gets held slightly open, which causes the exact leak you're fixing. Too loose and the chain tangles under the flapper. Half an inch.
Turn the water on, let it fill, and flush twice.
The fill valve fix
If water was running over the overflow tube, start with the cheapest possibility: the float is set too high.
Modern fill valves are a plastic column with a cup-shaped float that slides up and down it. On most, there's a thin metal rod or a plastic clip on the side. Pinch the clip, slide the float down about half an inch, let go, flush, and watch where the water settles. You want it an inch below the top of the overflow tube. Repeat until it lands there.
If adjusting does nothing and the valve keeps running, or it shudders and whines, replace it. A Fluidmaster 400A is the common one, around fifteen dollars, and it fits the great majority of toilets.
Water off. Drain and sponge the tank. Put the bucket under the tank nut.
The supply line threads onto a plastic shank on the bottom of the tank. Unscrew the coupling nut by hand if you can, pliers if you can't, and expect a cup of water. Then unscrew the larger lock nut above it, on the outside of the tank bottom. That one is often crusted on. Quarter turn at a time.
Lift the old valve out through the top.
The new valve has a cone-shaped rubber washer that goes on the shank inside the tank, sitting on the tank bottom. Don't reverse this. Set the valve height before you install it: most twist to extend so the top of the valve sits at least three inches above the overflow tube. Drop it in, hand-tighten the lock nut underneath, then give it maybe another half turn with pliers.
That's the part people get wrong. Plastic threads strip, and a cracked shank means buying the valve twice. Snug is the target, not tight.
Reconnect the supply line hand-tight plus a nudge. Clip the small refill tube into the top of the overflow tube. Water on, slowly, and watch the connection for a bead of moisture while the tank fills.
Prove it's fixed
Put four or five drops of food coloring in the tank after it's refilled. Don't flush. Go do something else for fifteen minutes.
Come back and look in the bowl. Clear water means the flapper is sealing and you're done. Any tint at all and water is still getting past, which means the seat needs a proper scrub or the flapper isn't the right one for your model.
One honest trade-off. If your toilet is old enough that the tank bolts are corroded and the flush valve itself is pitted, you can spend two hours and thirty dollars chasing leaks in a fixture that uses three and a half gallons per flush. A new toilet is a couple of hundred and a Saturday morning. Sometimes the right repair is a replacement.
But most of the time, it's a six-dollar piece of rubber and a dirty ring you could have wiped with a rag.
Keep a spare flapper in the cabinet under the sink. The next one will fail on a holiday, when nothing's open.
Wes Dunbar
Country & Skills
Grew up on an acreage and never quite left. Covers trucks, trades, land, and how to do the thing yourself.

Watch
Worth an hour of your evening
More from Skills.
From channels we rate. Plays on YouTube.
Read next